The colour of a map comes from three separate systems, and it helps to know which one you are looking at before trying to change it:
| What you see | Where it comes from | Painted with |
|---|---|---|
| the ground’s texture: sand, gravel, grass, rock | PBR materials and their layers | the PbrMaterials brush |
| a colour cast over that texture | tint | the Colorization brush |
| roads and tracks | overlays, which carry their own texture | the Overlay tool |
Water colour is a fourth, set per river. See Rivers, lakes and waterfalls.
How much of this is tested
Materials, layers, the Colorization brush and the overlay limit are from Saber’s guides. The tint file layout and the colour derivation come from work on a real map. Custom ground textures have been worked out from the shipped files but not built as a finished workflow, and are labelled.
Terrain texture layers#
Ground textures are painted with PBR materials. documented
Right-click the terrain (or the PbrMaterials section of the Scene View) and choose Add PbrMaterial. Each material has 4 layers, and a map can have at most 4 materials. Each layer is a texture: sand, gravel, rock, grass and so on.
Two levels of painting#
This is the part that is easy to miss. documented
- Opacity mode paints which material a terrain block uses. It works per 24 m block, and each block can use one material only.
- Then the layer modes paint that material’s layers within the blocks.
With more than one material, do the Opacity painting first. Because a block holds one material, the boundary between two materials falls on a block edge and can show as a hard line. Saber’s fix: use the same textures as layers on both sides of a boundary, so the blocks blend across it.
As with the other brushes, holding the right mouse button paints; a Value above
0.50 adds the layer and below 0.50 erases it.
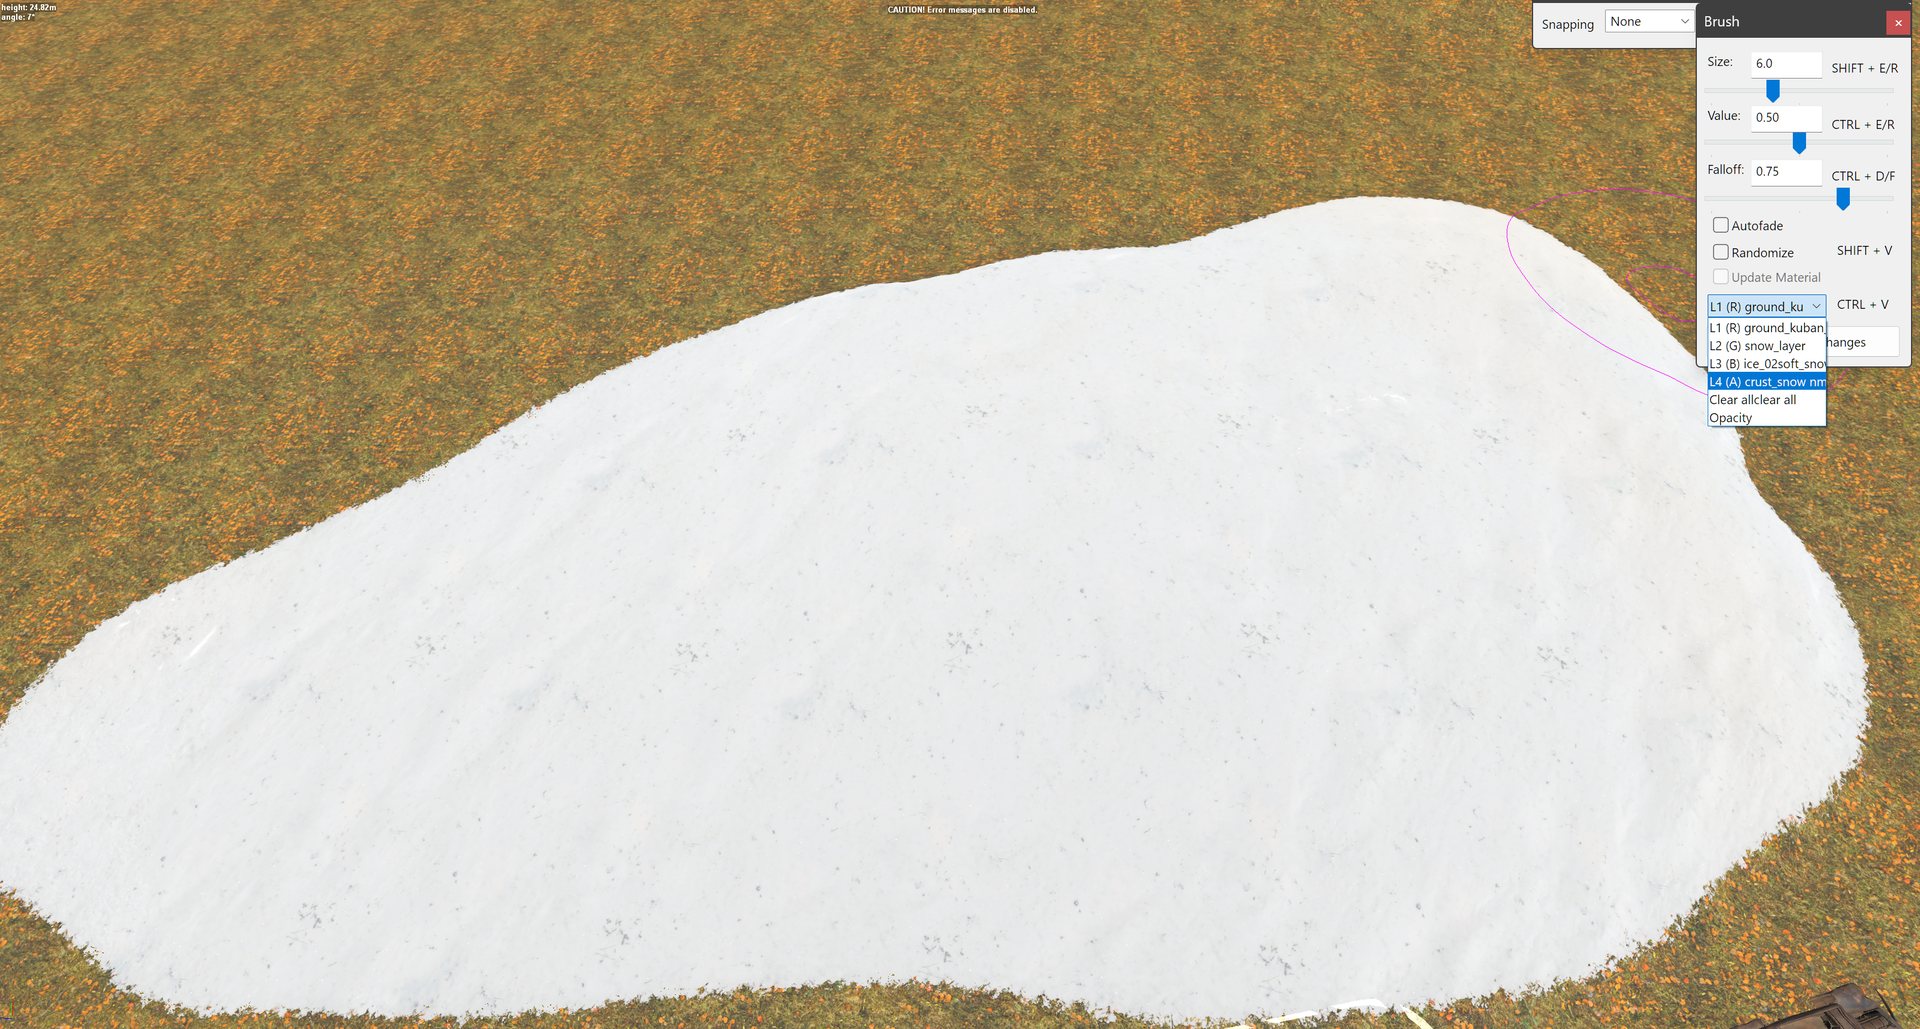
The brush window’s dropdown is where you choose between the two levels: the
material’s layers (L1 to L4) for layer painting, and Opacity at the bottom for
the material itself. Here a snow layer is being painted over the ground layer.
Settings#
Saber recommends nearly the same settings on every material of a level, so that painting is predictable and boundaries do not jump. documented
| Setting | What it does | Saber’s suggestion |
|---|---|---|
AlbedoWetnessMult |
how much wetness darkens the ground | 2 summer and autumn, 1 winter |
RoughnessWetnessMult |
how much wetness changes its roughness | 0.5 summer and autumn, 1 winter |
| Tiling scale (per layer) | how often the texture repeats | grass, earth, sand 5; gravel 3; snow 2.2; rock 1 |
| HM blending contrast (per layer) | how sharp the border is where layers blend | soft surfaces 0.7 to 0.8; hard 0.8 to 0.9 |
On snowy maps the third layer should always be snow_layer, and materials ending
_snowy are made for winter.
What a ground layer carries besides colour#
Each layer texture is backed by a class under classes\terrain_layers\, and that
class does more than look like gravel. The shipped arizona_gravel names the grass
brush that grows on it, its driving sound, its impact and skid sounds, and whether it
takes wheel tracks; arizona_sand adds drag and dust. So choosing a layer also
chooses how the ground sounds and behaves.
Your own ground textures#
Saber documents custom materials in the PDF Custom Level Entities: Models, Overlays
and PbrMaterials. Once installed correctly and the editor restarted, a custom texture
appears in the layer’s file picker with a \Media suffix.
documented
Read from the shipped files, a custom layer needs a diffuse and a relief texture in
Media\textures\tiles\ (<name>__d_a.tga and <name>_relief__d_a.tga), a class at
Media\classes\terrain_layers\<name>.xml, and a layer entry in the map’s
PbrMaterial. unverified as a finished workflow.
Tint#
The Colorization brush (under Geometry) paints a colour cast onto the terrain. Pick the colour with Set; the slider sets the strength. Right of centre paints, left of centre erases, dead centre does nothing. documented
On disk, tint lives in each terrain tile as two images that work together:
| File | Holds |
|---|---|
_tint.tga |
the strength of the tint. R and G carry the same value; B is unused |
_base_tints.tga |
the colour applied at that strength, as RGB |
That the Colorization brush writes these two files is unverified, though it is the only tint brush.
Colour and lightness are separate#
A tint is a colour, and colour has two parts: how light it is, and how much hue it carries (its chroma). Brightness alone only makes the same colour lighter or darker.
That matters when you derive a tint from imagery. On one map, a pasture tint made by subtracting the image’s average came out a neutral grey, (153, 155, 146), because removing the average removed the hue along with the lightness. Subtracting each pixel’s own lightness instead, keeping the direction of its colour, and re-centring on 128 gave (121, 170, 92), which reads as grass.
So when a tint looks washed out or grey, check that the hue survived, not just the brightness.
Road overlays carry their own colour#
A road is an Overlay object laid along a curve, not a change to the terrain’s layers. Its look comes from its own texture, so repainting the ground under a road does not change the road. documented
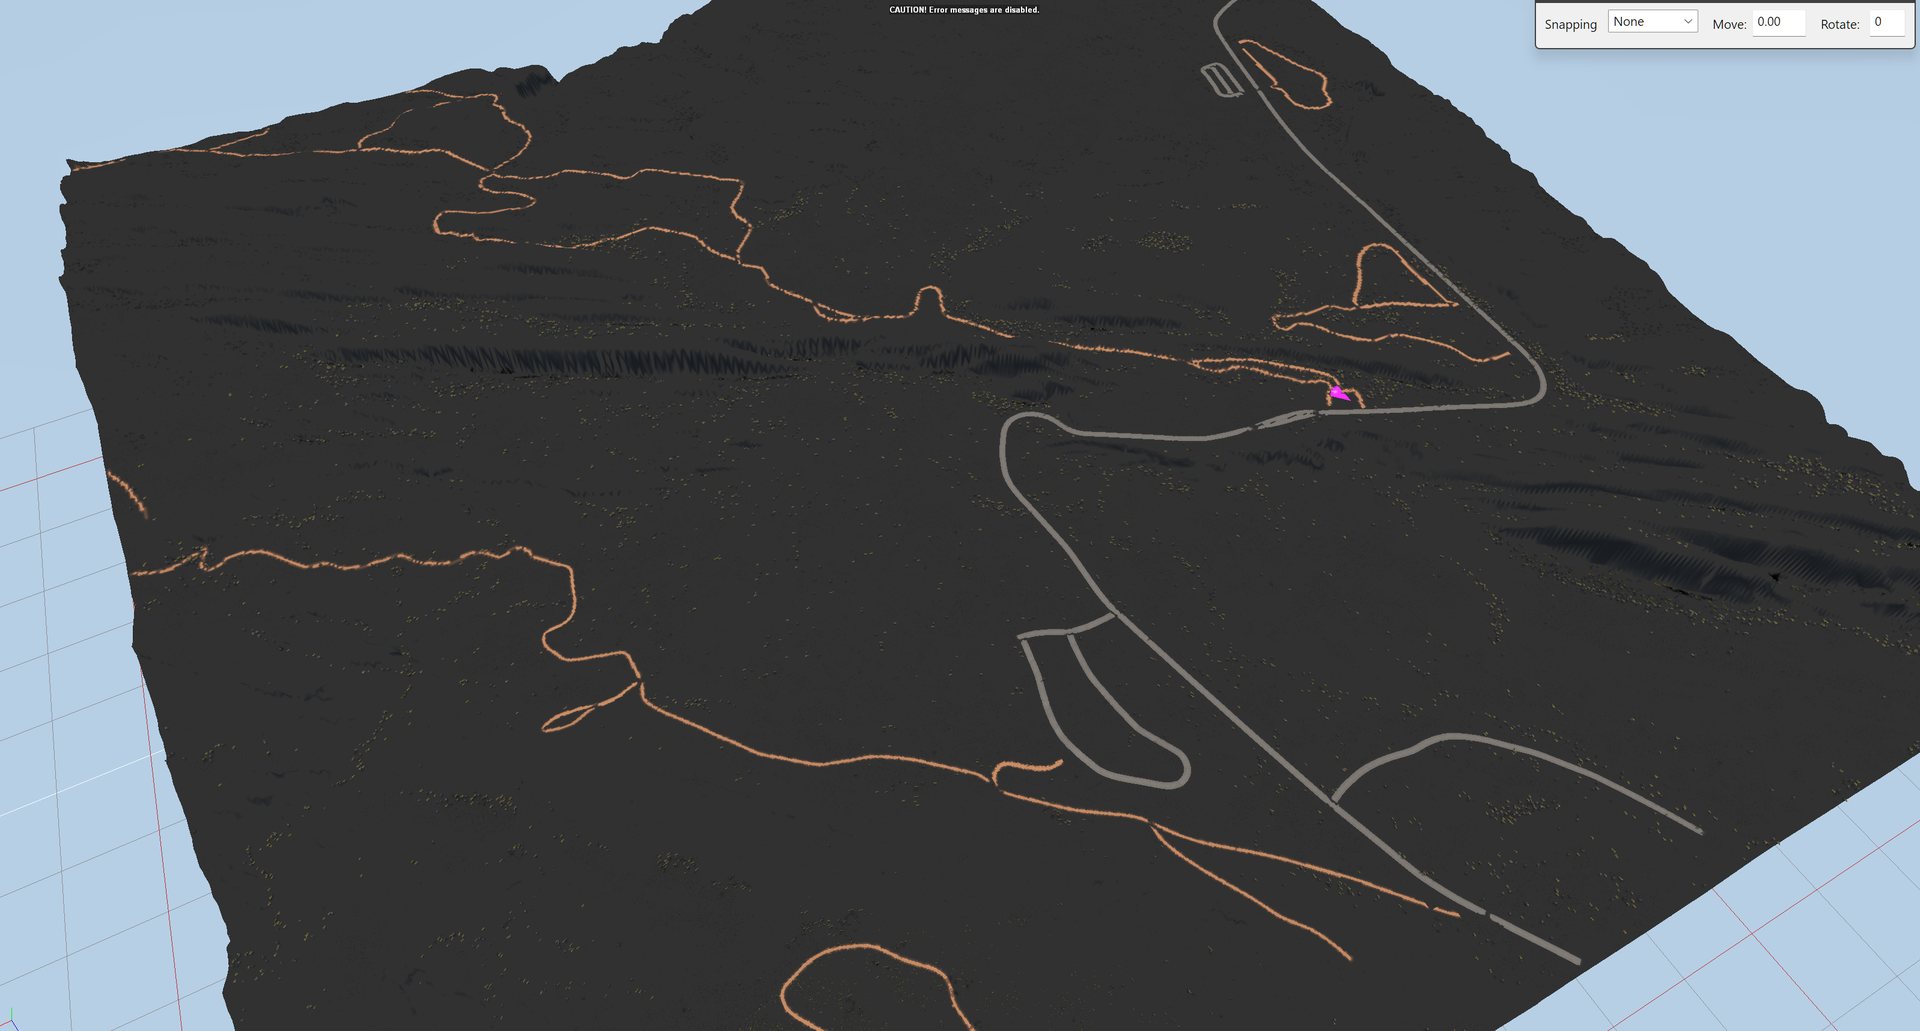
Seen on a real map: the ground here went black during a colour pass, and every road overlay kept its own grey or dirt colour.
Saber notes that Expeditions uses ordinary road overlays much less than SnowRunner,
and has its own: animal_tracks, cracked_mud and log_road.
Only one road texture shows per terrain block
The engine renders only one textural overlay per terrain block. Put two road types in one block and part of one becomes invisible. documented A textural overlay and a 3D one, such as a road and wires, can share a block.
To join two road types, keep each type’s main stretch in its own blocks, and at the junction paint the ground with a PBR material that uses a similar texture as one of its layers. Or hide the junction under snow or mud.
Click the terrain to see a block’s border as a red cube. How to lay roads is covered on Roads are not carved terrain.
What is not written yet#
Two points planned for this page have no source yet, so they are left out rather than guessed at:
- a general rule that two surfaces should differ in chroma, not only in brightness, beyond the tint example above
- a caution that satellite imagery providers disagree with each other on hue when matching a real place, and that ground photographs are the better reference