A river is not a blue road. Putting a strip of water across a valley does not make that strip fit the valley. It gives you a water surface. The ground still has to provide the bed and the banks.
Get those three things to agree first. Foam can wait.
What a water object is#
All water in a map, flowing or still, is a River object. documented It is a line of points, like a road overlay, with one important difference: every point has a height, and that height is the level of the water surface there.
A River is a surface, not a channel. It lays water over whatever is beneath it. It does not cut a bed. Saber’s own order of work starts with “prepare a deepening of the terrain” before you add any water. documented
On disk a point looks like this: measured
<River Flow="0" NeedFlowMapLoading="false" Clean="emerald" Muddy="brown" ...>
    <Node Position="(x; y; z)" Width="16.17662" />
</River>
The middle number, y, is the water height. Unlike an overlay, the points are
direct children of <River>, with no <Curve> around them.
The settings that matter#
| setting | what it does |
|---|---|
| UseFlowMap | false: water flows from point 0 towards the last point. true: you paint the direction with the Water brush |
| AvoidEffectOpacity | false (default): shallow water runs slower and with smaller waves. true: shallow but wild, for mountain streams |
| Clean Type | the water’s colour where it is clean |
| Muddy Type | the colour where you paint it muddy with the WaterMud brush |
| AboveReferences | keeps this river’s colours from being overridden by imported references |
documented
To reverse a river’s flow, right-click it in the Scene View and choose
River … Invert. documented In the saved
file, UseFlowMap appears as NeedFlowMapLoading.
measured
The colour types are classes in the game files, such as emerald,
emerald_deep, green, brown, clay-orange, clay-red, blue,
blue_shallow, turquoise, dark and black. They differ in how far down you
can see: emerald shows about 1.9 m deep, green about 0.3 m.
measured
Rivers in the same block must match
Two rivers inside one 24 m terrain block must have the same settings. You
cannot merge a river that uses a flow map with one that does not, and merged
rivers need the same Clean and Muddy types. Otherwise one takes the other’s
colours and a hard colour edge appears at the block border.
documented
The mistake that looks wrong immediately#
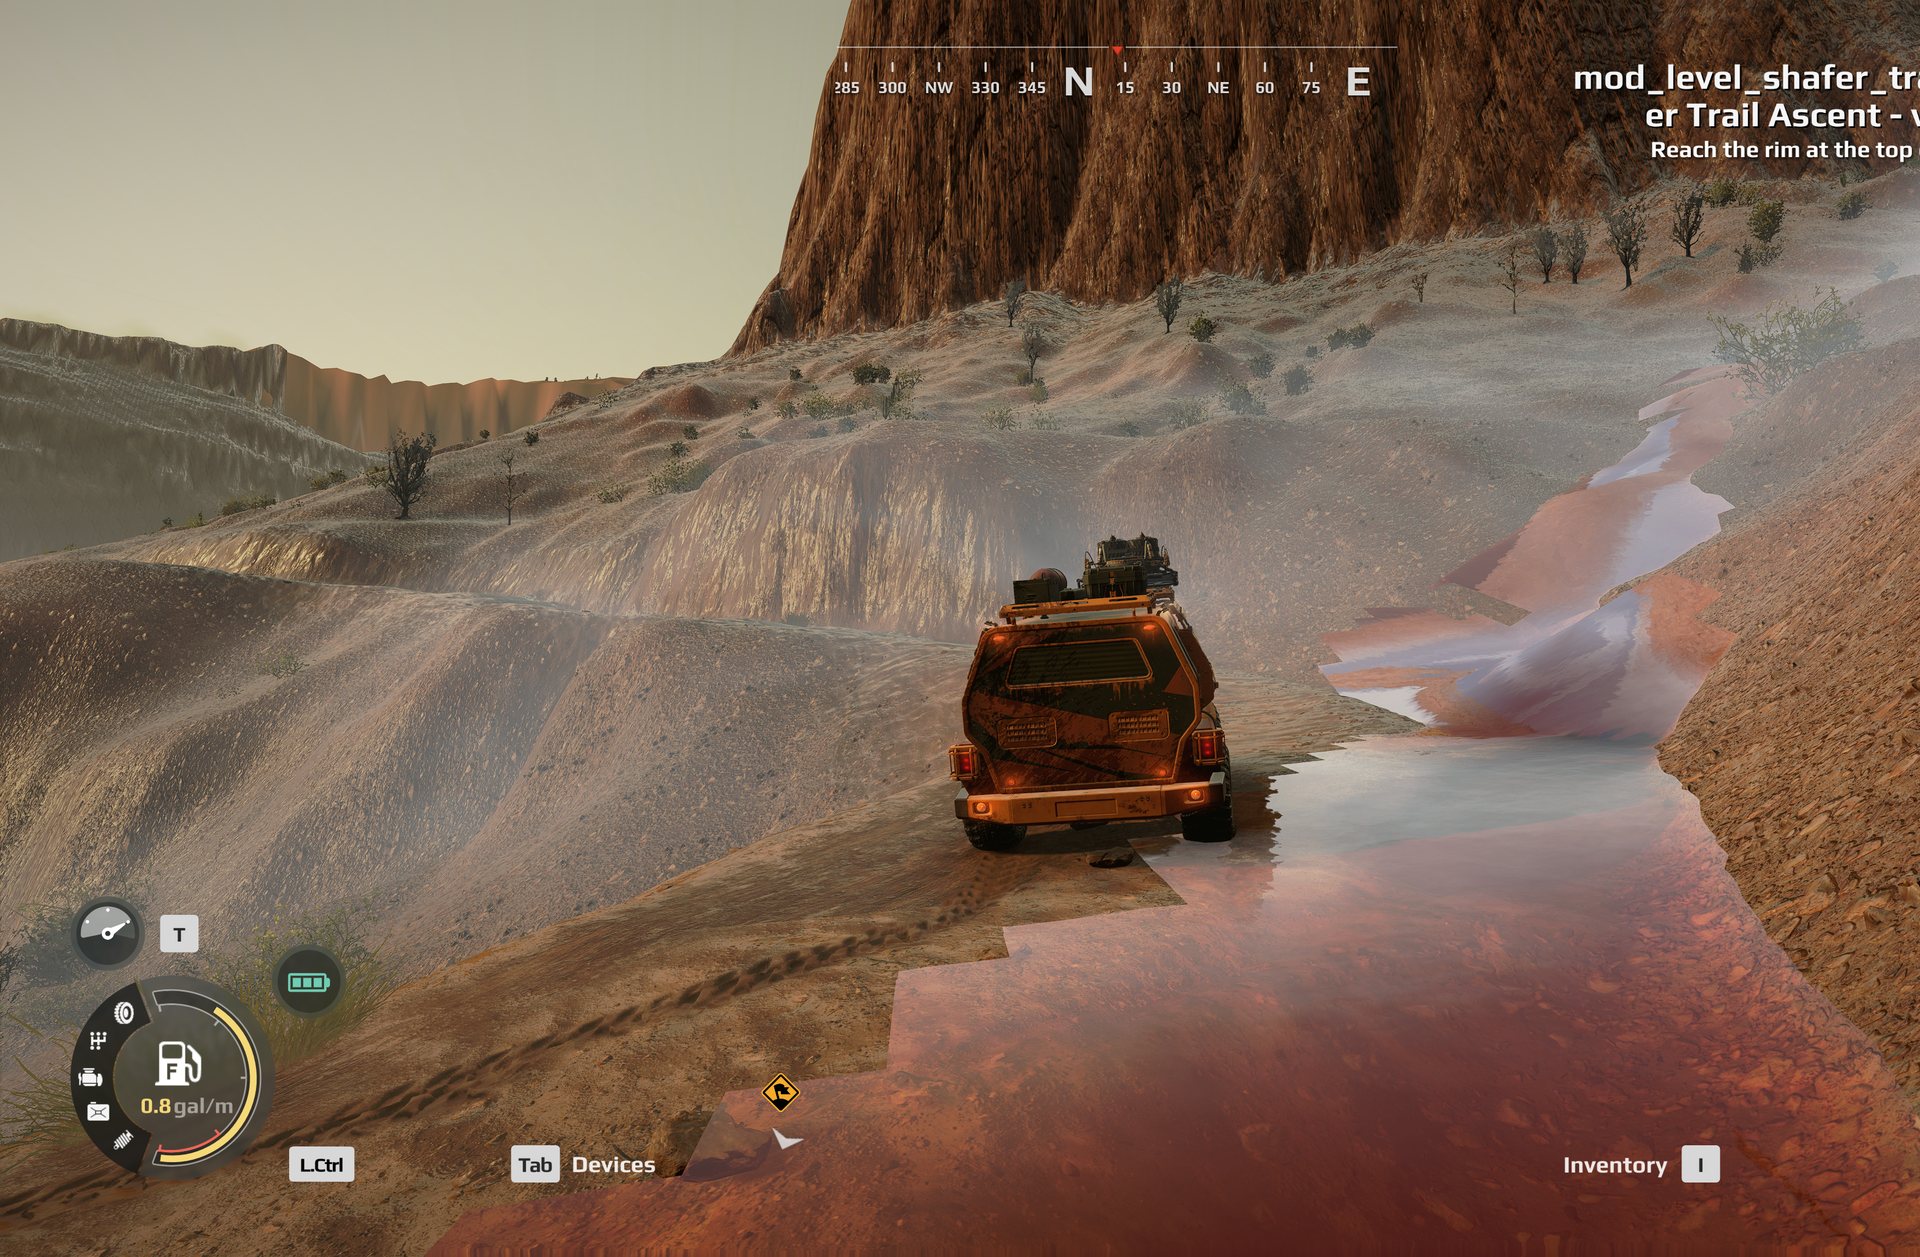
If you can see straight, square or saw-toothed edges floating over the ground, you are seeing the edge of the water object instead of a shoreline.
The fix is not always more width, and it is not always less height. Measure both. The visible water should meet soil on each side, with the outer edges hidden inside the banks. Check from road height, not only from directly above.
Saber’s rule for banks: the ground at the bank should be a little higher than the water, not the same height. Where they are level, the join looks bad; the usual fix is to raise the terrain slightly. documented
Two measurements show what “contained” means in practice. On two custom maps
whose rivers look right, the water’s edge sat 0.48 m and 3.70 m below the
bank (median per map). On a generated network that looked wrong, one edge point
in five floated more than 0.15 m above the soil.
measured
The jagged edge is partly a resolution limit
The built water surface is stored much more coarsely than the ground: on a full-size map, one water sample for every 12 terrain samples. A shoreline cannot follow the ground more finely than that, so the edge steps. It is worst on flat ground, where a small height error moves the shoreline a long way, and disappears on a steep bank. There is no setting to raise the water resolution. Cut a defined bank where water meets flat ground. measured
The mistake, in the game. River pieces that do not fit their channel render as a stepped sheet climbing the slope beside the road.
Measure in two directions#
Along the channel, measure the bed and the fall toward the outlet. A flowing reach needs a connected downhill route. Do not stretch one horizontal sheet down a steep ravine. Equally, do not force a pool to follow every bump in its bed.
Across the channel, measure from bank to bank, at right angles to the local flow direction. The water surface is normally level across a section. Follow the bend when choosing that direction; the map’s X axis is not the river’s cross-section.
A steep channel is not itself a problem. A network built with an AI agent, with more than half
its length on ground steeper than 20 degrees, read correctly because the water
was contained by banks. Deleting steep reaches is the wrong fix; containing them
is the right one. measured
A heightmap is a starting point, not a promise about underwater ground. Survey data levels lakes and wide rivers flat by specification, so it describes a water surface rather than the bed. See real-world terrain before designing a lake around imported ground.
The road may not be the raw terrain
An overlay with Flatten on levels the ground under it when the terrain is built. Do not turn it off just to make a puddle show. You may uncover a much deeper hollow than intended.
Give each piece a name#
You should not have to click seventy objects to find one crossing.
One workable convention is W00_R000_Name_ReachDescription. W00 identifies a
channel; R000, R001 and R002 run downstream within it. Tributaries get their
own channel codes and a recorded connection to the receiving reach. Lakes use
L000, road pools P000, and culverts C000.
Use the real drainage name when you can verify it against mapping of that actual
channel. Otherwise use a clearly descriptive name such as
W01_R000_UnnamedDrainage_UpperChannel. A named canyon nearby is not evidence that
its stream has the same official name.
The label is for people. The object ID is for the files. Keep both, and keep a small index linking labels, IDs, source files and upstream/downstream neighbours.
A name in a spreadsheet is not a name in the editor
Confirm that the editor displays your label and lets you select its nodes. If individual rivers cannot retain labels, test a named group containing one river. Save and reopen it before adopting the method. The exact serialization has not been verified; do not invent a River XML attribute. unverified
Build the first reach by hand#
- Back up a map that already rebuilds and deploys. Work on a separate copy.
- Choose a short, uncomplicated channel. Measure its bed and both banks.
- Use Add River from the terrain’s context menu, or from the Rivers node in the Scene View. Add points with Add after and Add before, as on an overlay. Set each point’s height in Position Y and its width in Width. documented
- Rebuild and inspect the whole reach from both banks. Check between points and around bends, not just where the handles sit. Lower, narrow, widen or reroute where needed. If no banks exist, design the channel before adding more water.
- Inspect both ends. Connect them to another reach, a pool or a deliberately concealed endpoint. Do not leave a visible square cap.
- Give the reach its label and test that you can find its points after reopening.
- Pack and drive it. Then extend it.
In hand-built work the width changes from point to point to fit the channel.
On two custom maps whose rivers look right, the median width was about 5.5 m
and 18 m, with points about 5 and 12 m apart. A small mountain stream is
about 5 to 6 m wide; a 33 m desert-wash width used on an alpine map turned
streams into corridors covering almost a quarter of the ground.
measured
See Saber’s river instructions for the controls in your editor version.
A lake is a bowl, not a wide river#
Pick a water elevation and inspect the entire shoreline. The surrounding terrain must contain that level. A low saddle is an outlet, not a bank you can ignore: read the level off that spill point, and dig the basin before you add water.
In maps that load, a lake or pool is a River with 3 or 4 points, the same
height on every point, and a large width, for example 3 points at 55.8 m
wide. measured Shape it to cover the basin
and hide its outside edges under the surrounding terrain. Check the bed depth
separately from the surface height, especially anywhere a truck can enter.
A hole is not a lake
A basin cut into ground that falls further across its own width than the cut is deep cannot hold water. In one generated map, seven of eleven basins failed this way. measured
Water beyond the map edge#
The terrain properties have a Background Water section that extends a flat water surface past the edge of the map, for a coast or a lakeshore. documented
- Make a flat River at the map edge, the same height on every point.
- In the terrain’s Background Water fields, set Height to that river’s Y and Type (Clean) to its Clean type, and enable the edge or edges it should extend from.
- Keep the river’s edge more than
64 mfrom the map edge, or the player sees the “No entry” signs. - Hide the corners, where the surface looks odd, behind rocks or terrain, or enable the neighbouring edge too.
When the channel goes under a road#
Mark a planned culvert explicitly. Do not let an automatic watershed tool treat the road embankment as the end of the channel.
For a crossing designed with matching mouth levels, connect water on both sides at that specified elevation, beneath the roadway. Keep the exposed inlet and outlet contained by banks. The covered section is allowed to disappear into the road terrain; raising it to become visible would defeat the crossing.
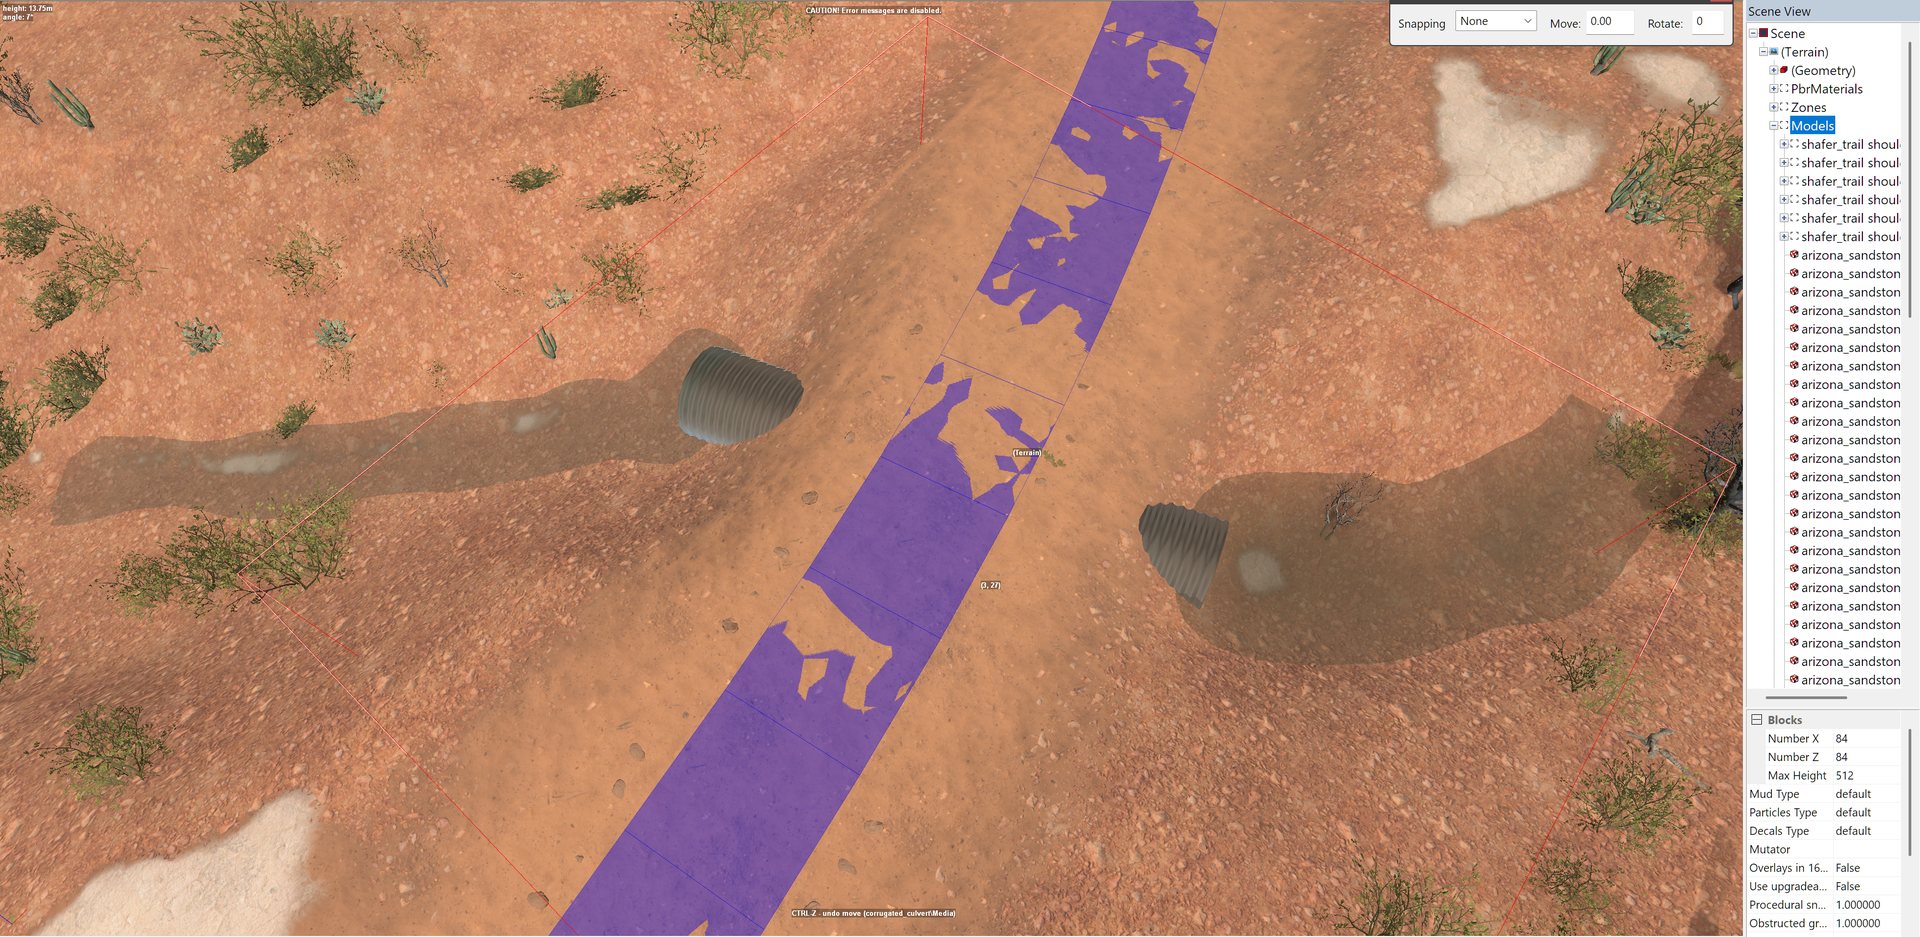
The culvert model and its opening still need placement and collision checks. Drawing water through solid ground does not cut a tunnel. A ford or washout is a different design, not an excuse to apply this exception everywhere. unverified This crossing method has not yet been confirmed in game.
Culvert pipes placed where a wash crosses a road, in the editor. Not yet confirmed in game, as the note above says.
Waterfalls are two rivers#
A single River cannot be made to fall. A waterfall is built from two: measured
- an upper River whose last point sits at the lip of the drop
- a lower River whose first point sits at the base, close by on the map
The engine joins two rivers whose ends are close together horizontally and ignores the height between them, pulling the water down as a fall. On five hand-built falls that work:
| range | |
|---|---|
| horizontal gap between the two ends | 2.6 to 13.8 m, median 6.0 m |
| drop | 15 to 43 m |
The gap and the drop are unrelated: the tallest fall had the tightest gap. Do not scale one with the other. Other things those falls had in common:
- both rivers sit in one subgroup file
- the lower river often starts flat for a few points, a plunge pool, and only then descends
- the widths do not have to match across the break
- several upper rivers can feed one lower river
A waterfall needs a cliff
Two generated falls dropped the water two to four times further than the
ground fell, 31 m of water over 6.9 m of ground, and rendered as water
pouring down an open hillside. Build the drop in the terrain first, and
check it, before you build the water. measured
A repeatable procedure for falls, including effects and foam, is still being tested.
Make it move after it fits#
Flow direction, speed and foam are not the same setting. Neither are brown water, wet ground and deep mud. Check each one independently.
The Geometry > Water brush does not create water; it paints three things on water you have already added. documented
| mode | stored in | notes |
|---|---|---|
| Foam | green channel of _water.tga |
paint where water is disturbed, such as against rocks |
| Speed | blue channel of _water.tga |
Value 1 is the fastest |
| Flow | _water_flow.tga |
only used if UseFlowMap is true |
The WaterMud brush blends a river between its Clean and Muddy colours. It is colour only; it does not make anything muddy to drive. documented
Turn Autofade off for Flow
Painting flow with Autofade on corrects your strokes automatically and gives a wrong flow map. Set the main direction with a very large brush first, then add detail near obstacles and banks with a smaller one. documented
The water masks exist only as tiles, one per map piece. There is no
full-size master to edit. measured In
_water.tga, the red channel is not the water’s extent: it holds the same grid on
every tile, including tiles with no water. The River object is the only record of
where water is. measured
Use the editor’s brushes and verify a small painted sample before asking a script to write masks.
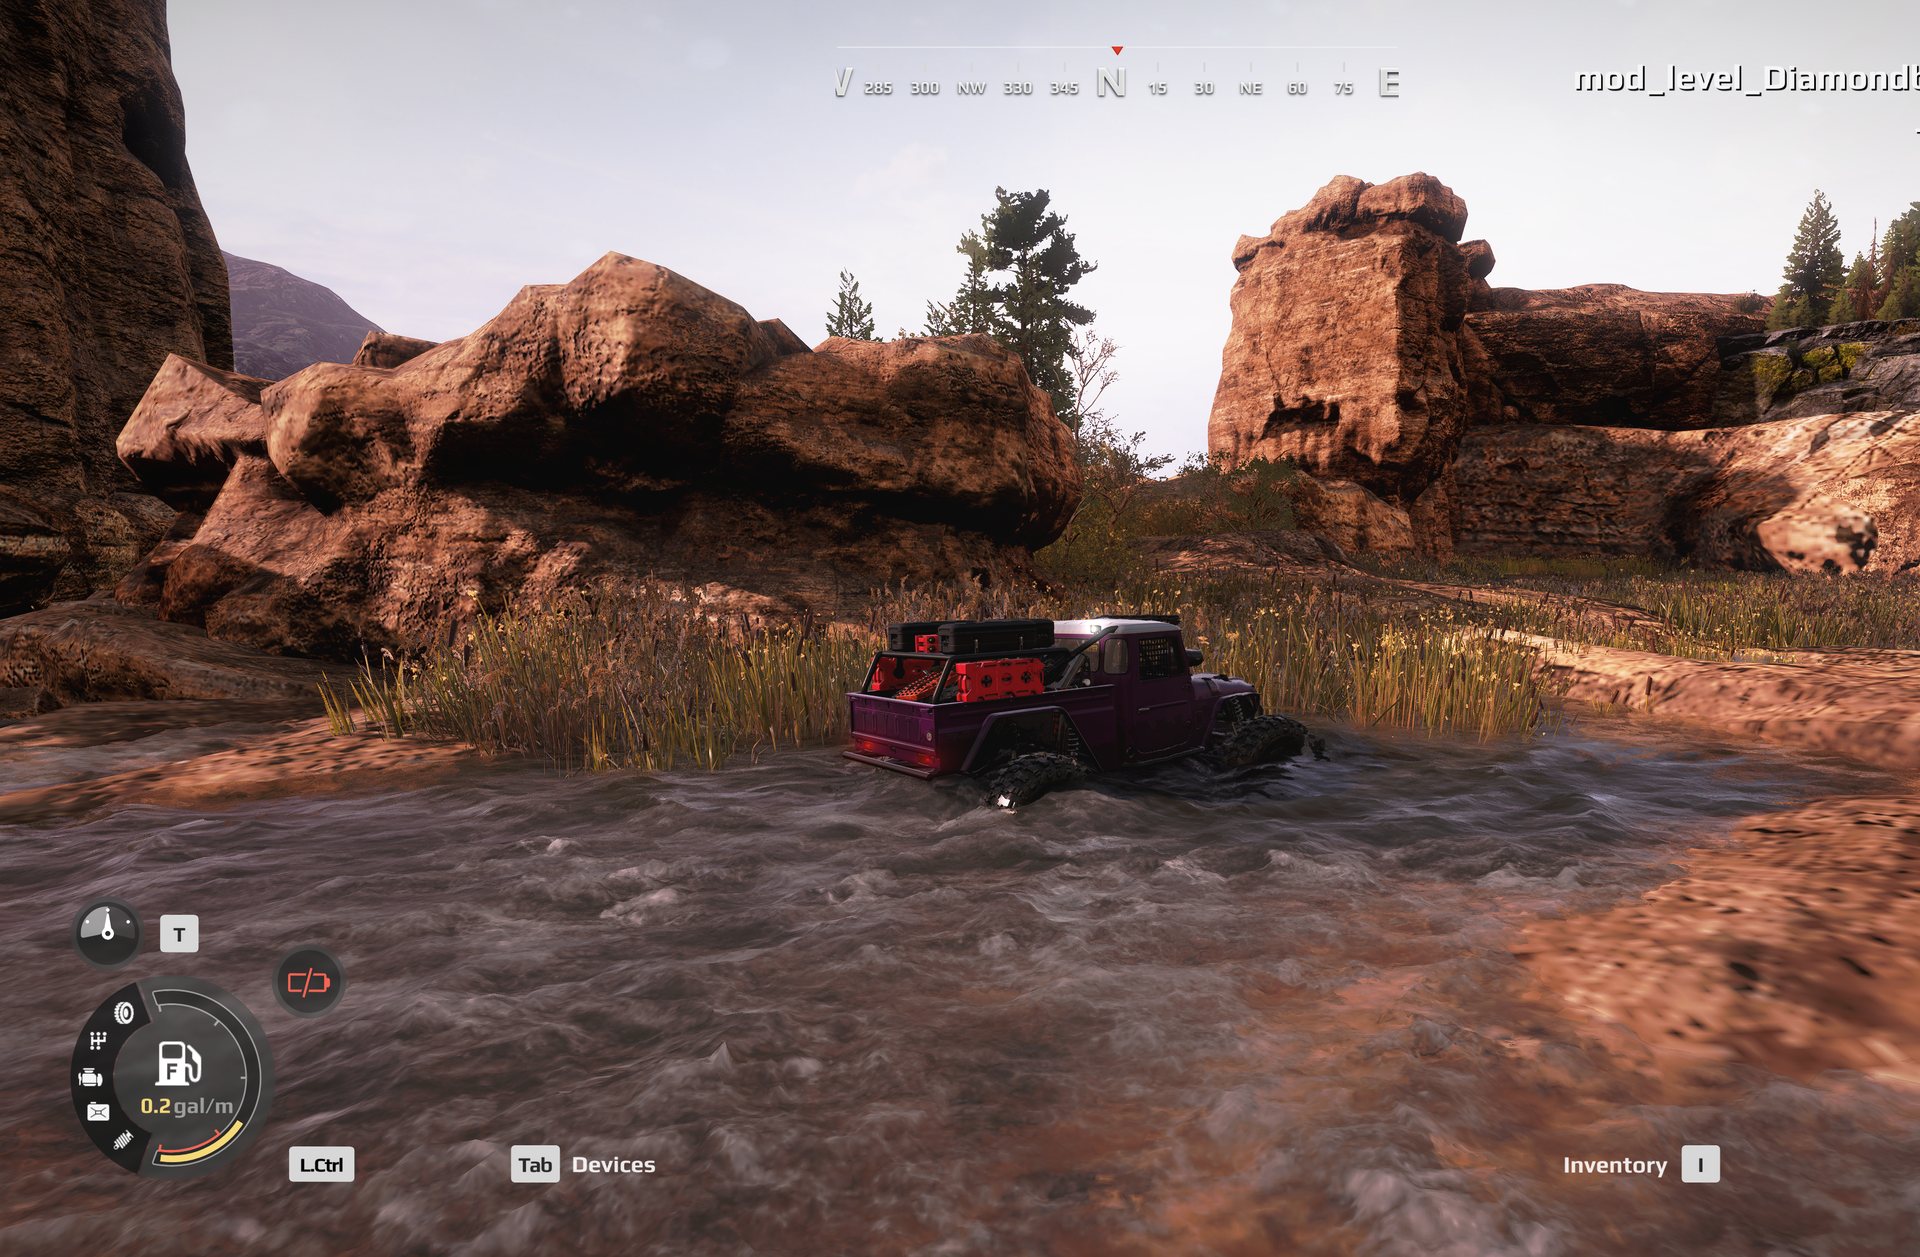
A river built in the editor, driven through in the game. The surface fits its channel and moves.
Foam comes from somewhere#
Put foam where water is disturbed, then carry it downstream. Real foam starts at a source, a rock, a drop or a kink in the bank, and streaks away downstream with the flow. Nothing makes foam across a whole cross-section at once.
Foam computed from position along the river alone came out as matching white
bands on both banks, which look painted on. Measured, it varied 52.3 along the
river against only 3.2 across it. measured
Two helper images#
From the Geometry node’s context menu: documented
- Create Water Heightmap writes
_water_height.png, the height of every water surface. The editor does not use it, but with the terrain heightmap it shows where water is and how deep, for generating bank vegetation or wet ground elsewhere. - Create Default Flowmap writes
_default_water_flow.tga, a flow map the editor works out from each river’s points and curvature. Edit it, rename it to_water_flow.tga, and set UseFlowMap to true to use it.
Ask AI for measurements, not reassurance#
A useful request looks like this:
Survey this channel along its bed and across both banks. Name every reach, preserve my edits, and show where the proposed water has no enclosing bank. Export one short test reach only. Do not change the road. Mark this crossing as a planned culvert with matching mouth levels.
Ask for the measurements, a connectivity index, a change list and a rollback copy. Then inspect the result yourself. A script passing its tests is not the same as the editor rebuilding, and neither proves the packed map deploys.
The toolkit has scripts for the parts that are measurement rather than taste.
paint_river.py writes speed, foam and mud masks from the river’s slope, learns
its scale from any reach you have already painted by hand, and never overwrites
your paint. shape_river.py changes only the heights of a river’s points, to
give it a riffle-and-pool profile, and leaves everything else in the file
untouched. Both dry-run unless you add --apply.
python paint_river.py level_<name>
python shape_river.py level_<name>
Neither is an automatic river designer. Waterway tooling for AI agents is still a preview: one short reach has received a positive visual review, while bends, junctions, naming and exporting a full network still need validation. unverified
Keep the change small enough to blame
Build one reach. Check it. Save a known-good version. Add the next reach. If a build fails, undo that last isolated change before collecting more guesses. A crash at a step labelled plants does not, by itself, prove that the plants caused it.
Not yet known#
- How to label a single river so the editor shows the name.
- Whether the culvert crossing above works in game.
- A repeatable procedure for waterfalls, with foam and effects.
- How bends and junctions behave when generated by a tool.
Read Saber’s pages first:
python wiki.py howto river